Compute Instance
On-demand GPU instances with SSH access to run any GPU-accelerated workloads and let you run, test, and experiment with any AI application seamlessly.
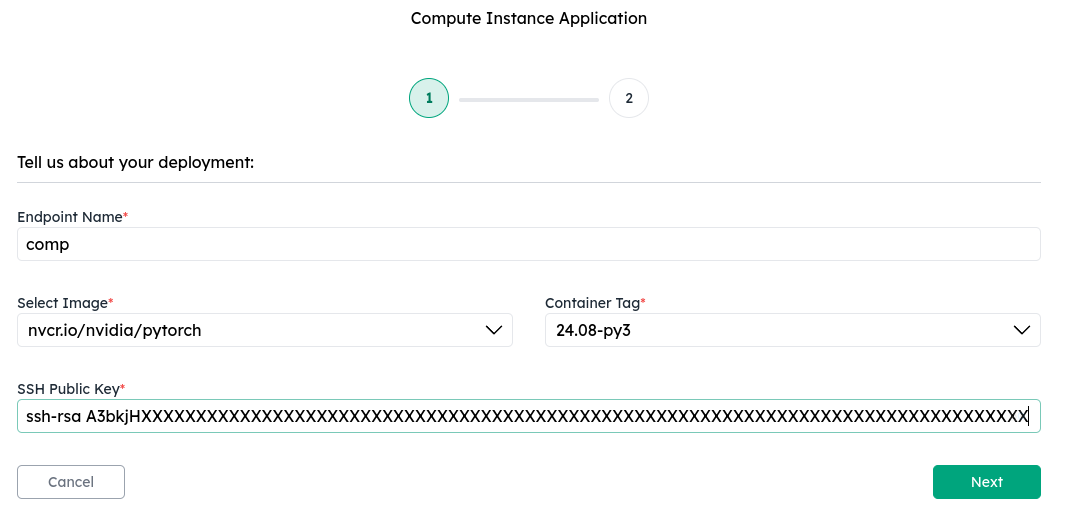
1. Choose an image
Compute instances can run any container image. In the Add or Select Image field, type the name of an image from a container registry and set the Container Tag. For example, use image ubuntu with tag 24.04, or image nvcr.io/nvidia/pytorch with tag 26.01-py3. If your environment defines suggested images, they appear in the dropdown.
On full GPU instances, NVIDIA drivers are included via driver passthrough, so the GPU is accessible even from a minimal image like ubuntu. On MIG instances, NVIDIA drivers are not available yet. CUDA and framework libraries are not injected and must come from the image itself, so for GPU workloads pick an image that bundles them, like the NVIDIA NGC PyTorch image.
Your image does not need an SSH server preinstalled. CCluster injects one at deploy time without modifying the image. The SSH server runs as the container's main process, so the image's own ENTRYPOINT/CMD is not executed. Connect over SSH to start your workloads.
Private registry images
To deploy an image from a private registry (e.g., Amazon ECR, Google Artifact Registry, Azure Container Registry, or a self-hosted registry), provide credentials in the Image Registry Username and Image Registry Password fields. You can enter them directly or select a Registry Credentials item stored in your Vault. CCluster automatically detects the registry from the image URL. For public images, leave both fields empty.
2. Configure access and deploy
Enter your SSH public key to configure access to the instance, select a GPU instance type, and click Deploy.
Optional settings on the create form:
- Enable logging — collect container output and show it on the deployment Logs tab.
- Annotations — optional key/value metadata on the instance.
3. SSH into the instance
Once the instance is ready, navigate to the deployment details page. The Endpoint Configuration section displays:
- Endpoint URL — the hostname for your instance. Next to it are the copy button (copies the URL) and the SSH button (copies
ssh root@<endpoint_url>so you can paste it directly into your terminal).
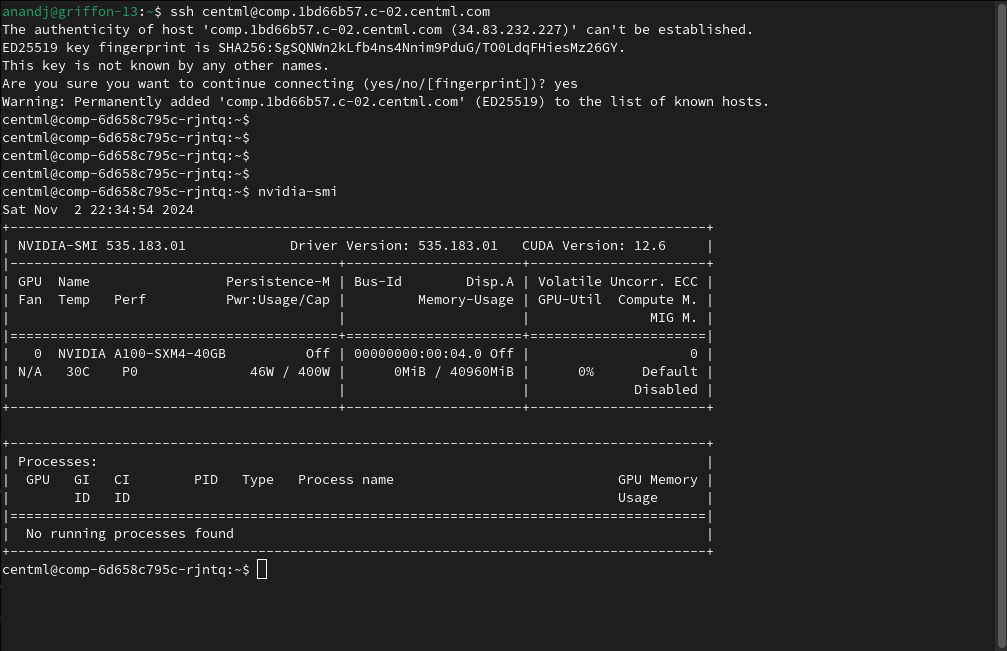
To connect, use the SSH command with the root user:
ssh root@<endpoint_url>
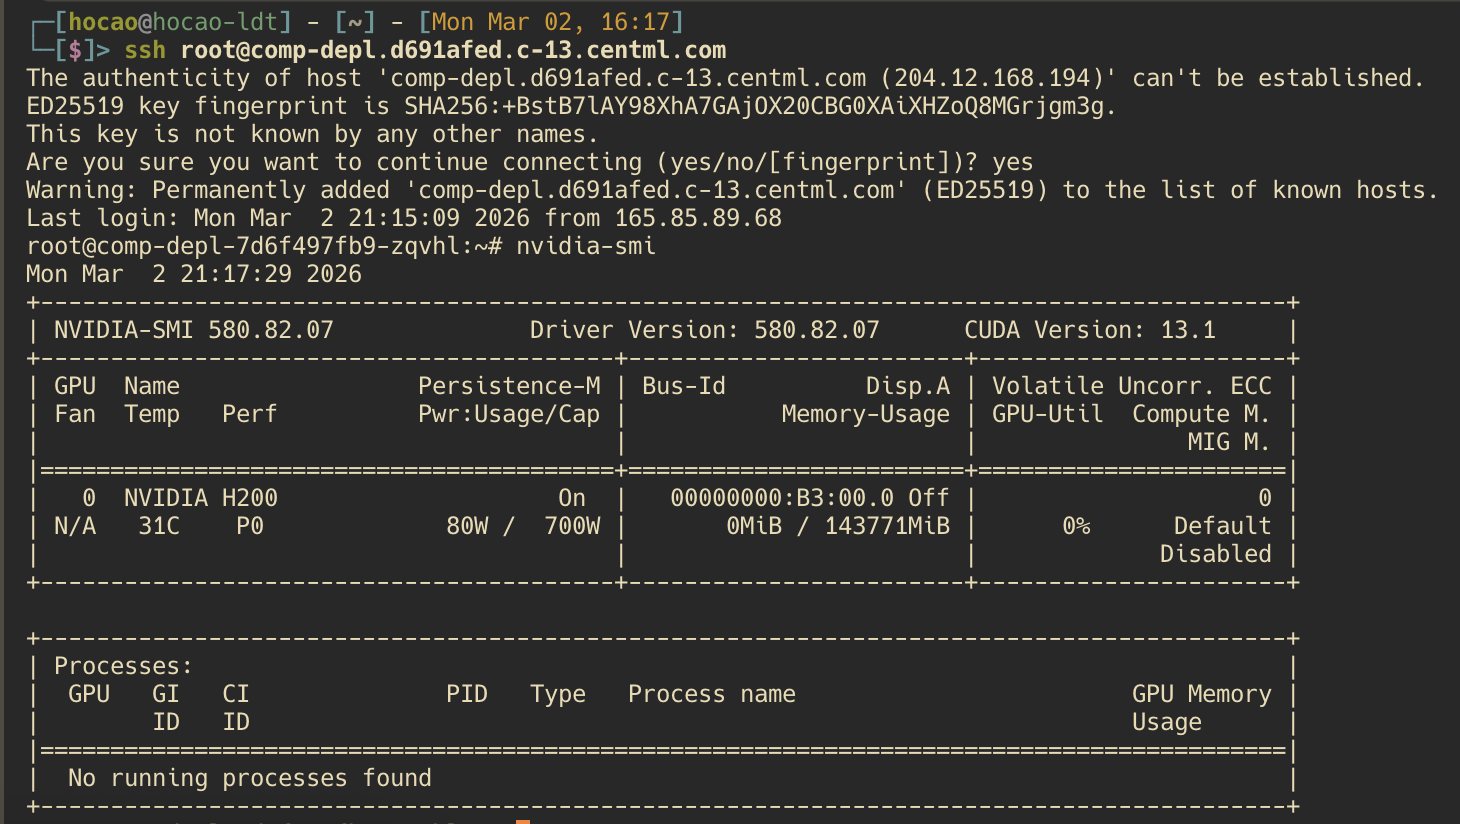
The instance authenticates you with the SSH public key you provided at deployment. You can also run one-off commands, transfer files, and forward TCP ports:
# Run a one-off command
ssh root@<endpoint_url> 'nvidia-smi'

# Copy files to and from the instance with scp or SFTP
scp ./train.py root@<endpoint_url>:/home/
scp root@<endpoint_url>:/home/results.csv .

# Forward a port from the instance to your local machine (TensorBoard in this example)
ssh -L 6006:localhost:6006 root@<endpoint_url>
X11 forwarding and SSH agent forwarding are not supported.
The interactive shell depends on what your image provides:
| Image | Shell over SSH |
|---|---|
Images with bash (e.g., Ubuntu, Debian, NGC images) | bash login shell |
Images with only sh (e.g., Alpine) | /bin/sh |
| Images without a shell (e.g., distroless) | No interactive shell. SFTP file transfer still works |
The instance includes the libraries from your image. Additional packages can be installed with your preferred package manager.
In-console Terminal
While the instance is Active, the deployment Terminal tab opens a shell in the browser without SSH from your machine. Use SSH (above) for scp/SFTP and port forwarding. See Managing Deployments for Terminal availability, pause/resume, clone, and logs.
Compute deployments are not revision-aware in the console: edits update the instance in place and there is no rollback table.